Raising Backyard Chickens for Beginners: 7 Numbers to Know
Three hens, 4 square feet inside per bird, 10 square feet outside, 1/4 pound of feed, 1/2-inch mesh, 95°F, and 18–24 weeks. Those are the seven numbers that give you a workable starting plan for a small backyard flock.
They’re planning baselines, not promises. Breed size, weather, local rules, forage, and whether your birds can leave the run will change the final setup. But if you can make these figures fit before ordering chicks, you’ll avoid the most expensive beginner mistake: buying birds first and trying to find room for them afterward.
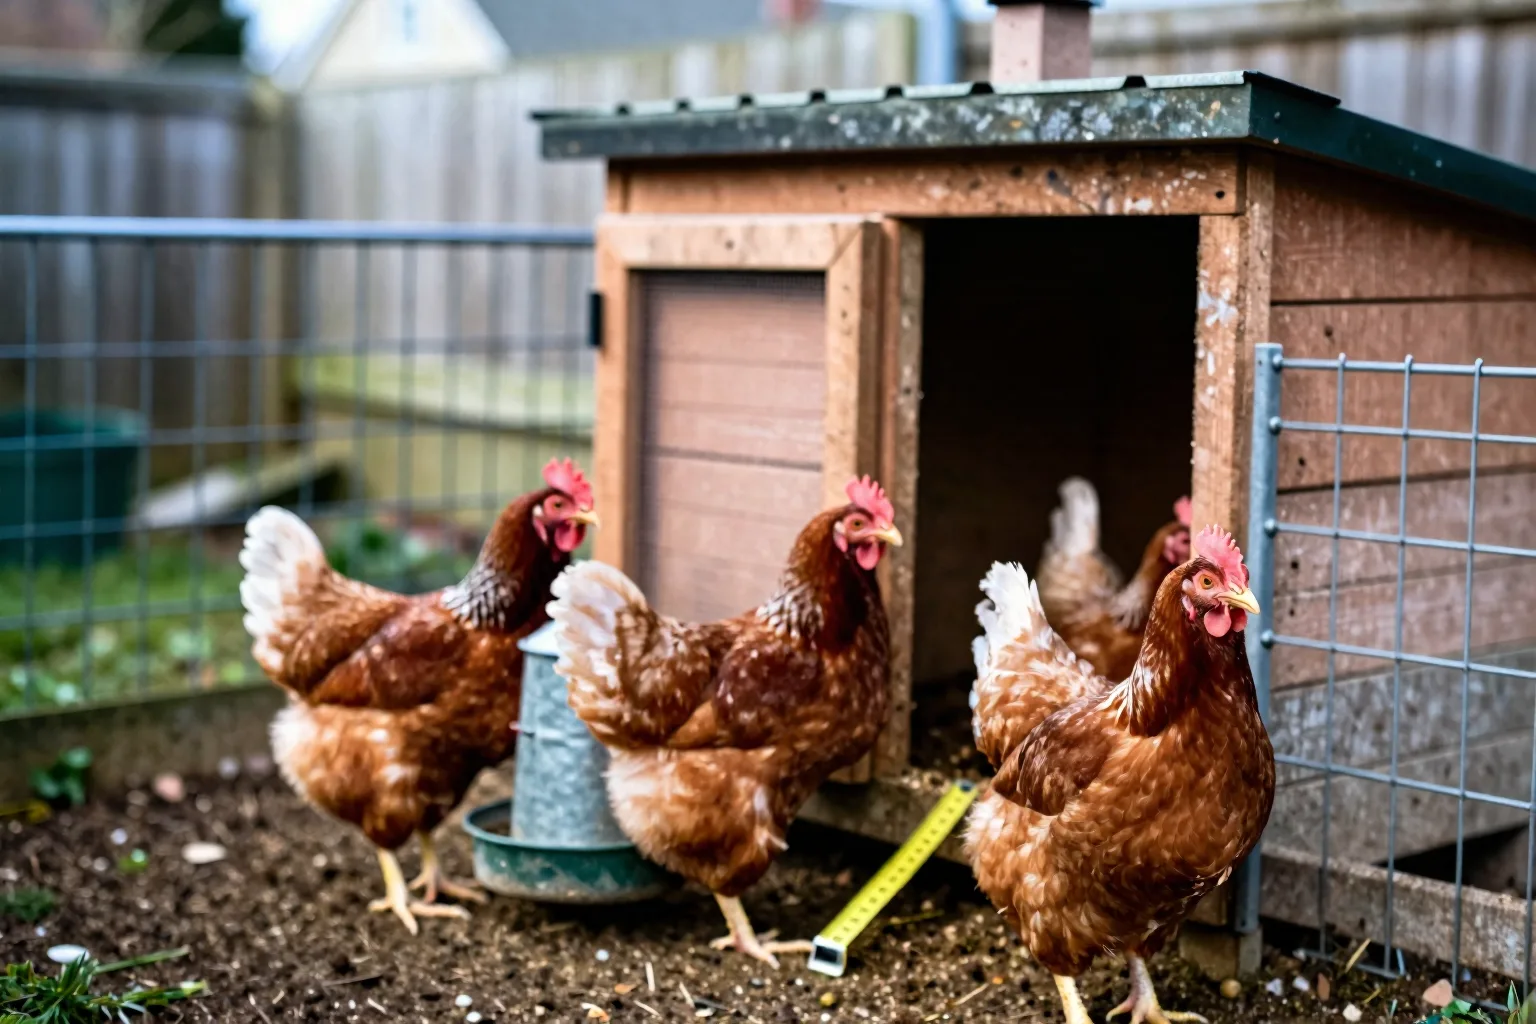
Start with the yard: 3 hens, 4 square feet inside, and 10 outside
The first number is 3 hens. For many first-time keepers, that’s a sensible social starting flock. Three birds give each hen flock company, while keeping the daily feed, litter, and egg volume manageable. It also gives you room to learn without building a full-size setup for birds you may not enjoy keeping.
That choice changes if you already know you want six or more birds. Adding birds later requires careful introduction and a place to separate newcomers. If the long-term plan is six hens, build for six now rather than squeezing a larger flock into a three-hen coop.
Number 2 is 4 square feet of usable enclosed coop floor per standard-size hen. This is a practical planning baseline for the indoor area where your birds sleep, perch, and shelter from bad weather. Count clear floor space. Don’t count a nest box that sticks into the room, a storage shelf, or a corner blocked by equipment.
Number 3 is 10 square feet of run space per standard-size hen. The run needs room for walking, scratching, dust bathing, and moving away from a flockmate. It also needs enough open litter surface that spilled water and droppings don’t turn the whole floor into a damp patch.
For three hens, the arithmetic is simple: 3 × 4 gives you 12 square feet inside, and 3 × 10 gives you 30 square feet in the run. A 3-by-4-foot interior and a 5-by-6-foot run meet those areas on paper, provided those are the usable inside dimensions and the layout leaves room for roosts, a feeder, water, and a nest box.
Going tighter can show up as wet litter, a sharp ammonia smell, pecking, broken feathers, and a coop that needs cleaning more often than you expected. Crowding doesn’t cause every health or behaviour problem, but it removes your margin for error. A spilled drink becomes a larger mess, and a timid hen has fewer places to move away.
Give yourself more than the baseline if your climate is wet, your winters keep birds indoors for long stretches, or you’re choosing a heavy breed. Extra room also helps when free-ranging isn’t safe or practical. Free-ranging is an optional activity. It shouldn’t be the calculation that makes an undersized coop appear adequate.
Before you buy birds, check your city or county’s backyard poultry ordinance. Look for flock-size limits, rooster restrictions, coop setbacks, nuisance rules, waste requirements, and any HOA conditions. A beautiful run in the wrong location is still a failed plan.
For a more detailed sizing worksheet, use How much space do chickens need in a coop and run?
The feed-bin number: about 1/4 pound per laying hen each day
Number 4 is about 1/4 pound, or roughly 110–120 grams, of complete feed per laying hen per day. Use that as a feed-bin planning midpoint when layer feed is doing most of the nutritional work. A large hen, a cold spell, heavy laying, or limited forage can push intake higher. Birds eating substantial forage may take less from the feeder, but you shouldn’t count grass or scraps as a balanced ration.
For three hens over 30 days, the calculation is 3 × 30 × 110–120 grams. That comes to approximately 9.9–10.8 kilograms of feed per month.
| Hens | Coop baseline | Run baseline | Feed for 30 days |
|---|---|---|---|
| 3 | 12 sq. ft. | 30 sq. ft. | 9.9–10.8 kg |
| 6 | 24 sq. ft. | 60 sq. ft. | 19.8–21.6 kg |
| 12 | 48 sq. ft. | 120 sq. ft. | 39.6–43.2 kg |
To turn that into a local monthly bill, multiply the feed your flock uses by the current price per kilogram. As an illustration only, if a 20-kilogram bag is priced locally at $20–$35, three hens using 9.9–10.8 kilograms would consume about $10–$19 of feed in 30 days. Bag sizes, brands, and local prices vary, so check the current price and the net bag weight at your feed store.
Age matters. Chicks need a chick starter or other age-appropriate ration, not layer feed. The mineral balance in layer feed is intended for laying birds. Move growing birds to the next ration according to the feed label, then use layer feed when they reach laying age. If you’re unsure which product fits a mixed-age flock, ask the supplier rather than guessing.
Keep clean water available every day. A hen can reduce feed intake when water is dirty, blocked, or frozen, and wet feed around a drinker quickly becomes a litter problem. Put the drinker where scratching birds can’t fill it with bedding, but low enough that every bird can reach it.
Treats should stay a supplement. A little vegetable trimmings or scratch can add interest, but a bucket of leftovers can dilute the complete ration. Offer insoluble grit when your birds eat whole grains or meaningful forage, and provide oyster shell separately for laying hens rather than mixing it through everyone’s feed.
Store feed in a dry, lidded container. Sweep up spills. Rodents are drawn by the feed you leave behind, not just by the bag sitting on a shelf. The feed math is expanded in How much does it cost to feed three backyard hens per month?
Why 1/2-inch hardware cloth beats chicken wire at the run
Number 5 is 1/2-inch welded hardware cloth. Use it as the main barrier on run walls, pop-door openings, vents, and other places where a predator might reach or squeeze through. The small welded openings make it harder for a determined animal to gain access than ordinary chicken wire.
Chicken wire is mainly a containment material. It keeps your birds from wandering out, but its larger openings and lighter construction can leave routes for raccoons, snakes, and smaller predators. It also doesn’t solve a digging problem. Calling a run predator-proof because it has chicken wire on the sides is a common planning error.
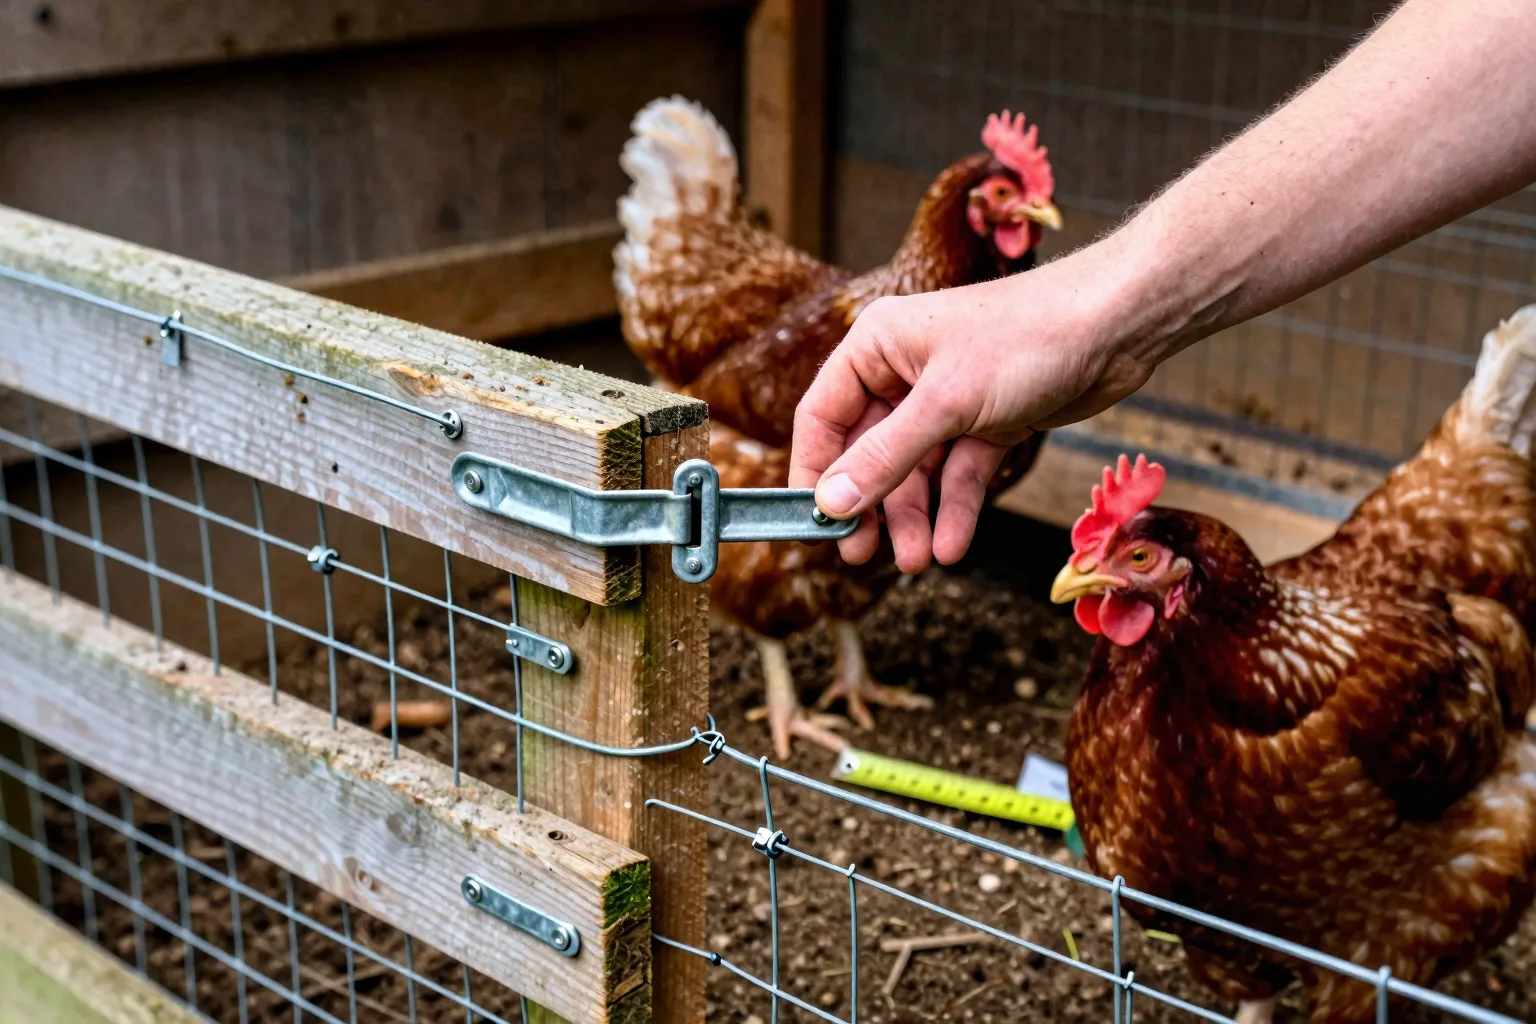
A predator barrier is a system, not just a mesh size. Fit the cloth tightly to a solid frame. Overlap seams. Fasten it with screws and washers or sturdy fencing staples that cannot be pulled loose from the wood. Cover the roof where hawks or climbing animals are a concern, and protect the edges of vents and doors as carefully as the broad wall panels.
At the gate, treat a simple sliding bolt as a weak point. Use a latch that needs two separate movements, and put it where a raccoon cannot reach through the mesh. Keep the pop door shut at night. A secure daytime run still needs a proper sleeping space because weather and predator pressure don’t follow your schedule.
For digging animals, extend a hardware-cloth apron outward from the run wall and pin it flat under soil, gravel, or turf. An apron around a foot wide is a practical starting point. A buried edge can work too. The goal is to make a digger meet mesh before it reaches the wall, where the ground is easiest to attack.
Walk the perimeter at dusk and after strong rain or wind. Look for lifted edges, washed-out soil, bent panels, loose staples, and a door that no longer closes flush. Stronger mesh costs more and takes longer to cut and fasten, but rebuilding a compromised run is harder than fitting the vulnerable edges correctly at the start.
Free-ranging can add exercise and forage, but it’s managed extra space, not a replacement for a secure run. Let birds out only when you can accept the local predator risk and bring them back into a protected area before night.
From a 95°F brooder to a first egg at 18–24 weeks
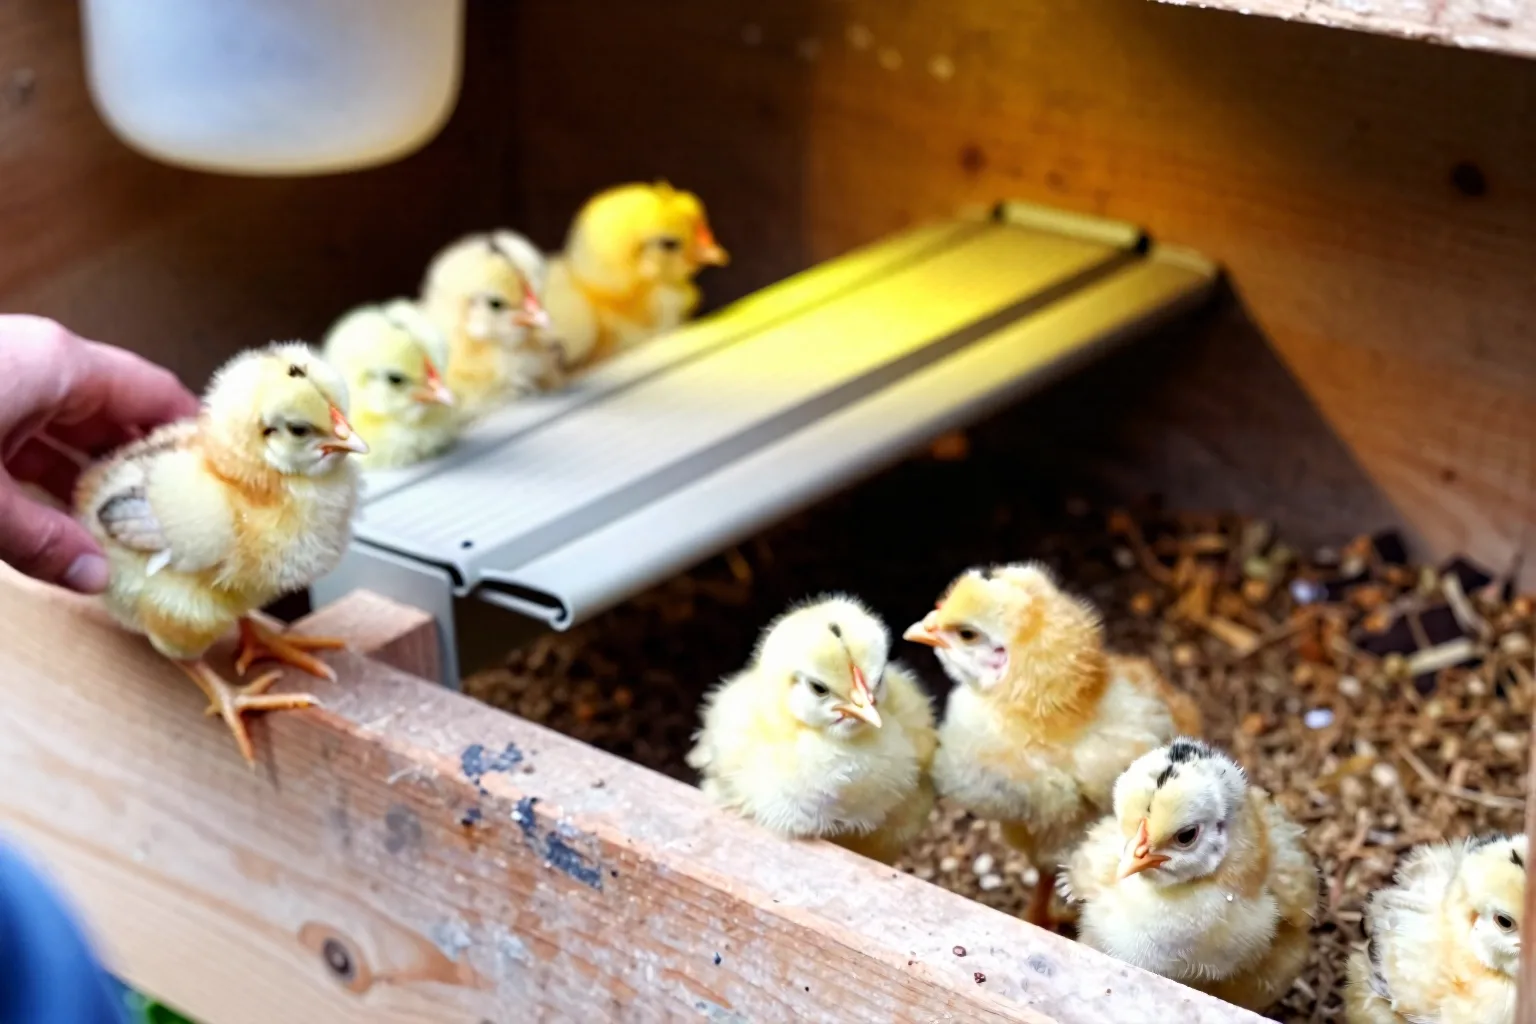
Number 6 is 95°F at chick height during the first week. Aim for a warm zone around 90–95°F, with 95°F as the upper starting target for newly hatched chicks. Measure where the chicks actually stand, not against the brooder wall and not in the hottest point directly under a lamp.
Reduce the warm-zone target by roughly 5°F each week as feather cover develops. A usable guide is about 85–90°F in week two, 80–85°F in week three, and 75–80°F in week four. Continue watching the birds rather than forcing the schedule. A drafty room, a large brooder, or slow feathering can change how quickly they cope with cooler conditions.
The brooder should have a warm zone at one end and a cooler escape area at the other. Think of it as a gradient, not a box that is the same temperature everywhere: heat source → warm end → open middle → cooler end. That layout lets each chick choose its comfort zone. If the heat warms the entire brooder, a chick has nowhere to go when it’s too hot.
- Chicks pressed tightly under the heat, with persistent loud peeping, need more warmth or a check for drafts.
- Chicks spread far from the heat, panting, or holding their wings away from their bodies may be too warm.
- Chicks loosely distributed, active, and settling for sleep across the brooder are giving you a better comfort signal.
Secure the heat source so it cannot fall into bedding. Protect cords from pecking and keep combustible material away from hot surfaces. Use dry, absorbent bedding and remove wet patches promptly. Ventilate the brooder without creating a cold stream at chick level. A thermometer helps, but chick behaviour tells you whether that measured spot represents the usable space.
If you buy started pullets, you can skip the brooder stage. That may simplify your first flock, though the birds may cost more and you’ll have less control over their earliest care. If you buy day-old chicks, have the brooder warmed, the drinker filled, and the correct starter feed ready before they arrive.
Number 7 is 18–24 weeks. That is a reasonable planning window for many pullets to begin laying, not a promised deadline. Breed and body size matter. So do daylight, season, nutrition, stress, and individual development. A pullet that reaches the upper end of the window without an egg isn’t automatically sick, and an egg at the lower end doesn’t prove the rest of the flock will follow on the same day.
Watch the whole bird, not just the nest box. A pullet that is bright, eating, drinking, and growing can simply be on a different schedule. Lethargy, weight loss, breathing trouble, persistent diarrhoea, or a sudden change in several birds is a health question rather than a calendar question. That’s the point to contact an avian or farm-animal veterinarian.
For the complete heat schedule and setup details, see Chick brooder temperature by week: a day-one to feathering guide. If you’re following current extension guidance on chick brooders, compare its recommendations with your equipment instructions and the chicks’ behaviour.
Three questions beginners ask before ordering
Do backyard hens need a rooster to lay eggs?
No. Hens lay unfertilized eggs without a rooster. You need a rooster only if you want fertile eggs for hatching. A rooster can also create noise and may be restricted by local rules, so don’t add one just because you want breakfast eggs.
Can chickens free-range instead of having a secure run?
Free-ranging can provide forage and exercise, but it doesn’t replace a secure run for bad weather, nighttime confinement, or predator management. Treat it as supervised or managed extra space. If you’re away at work all day, size the run as if the birds will spend the day there.
What backyard chicken rules should you check first?
Check the flock-size limit, rooster rule, coop setback, nuisance language, HOA restrictions, and any requirements for waste or slaughter before buying birds or materials. Start with your city or county’s backyard poultry ordinance, then check the private rules that apply to your property.
Save this seven-number checklist before you place an order:
- 3 hens, if your rules and yard allow them.
- 4 square feet inside per hen, or 12 usable square feet for three.
- 10 square feet in the run per hen, or 30 square feet for three.
- 110–120 grams of feed per hen per day, or about 10–11 kilograms for three hens over 30 days.
- 1/2-inch welded hardware cloth on vulnerable run openings.
- 95°F at chick height in week one, with a cooler escape area.
- 18–24 weeks as a first-egg planning window, not a guarantee.
Your next action this week is simple: mark a 3-by-4-foot usable coop area and a 5-by-6-foot run on paper or on the ground, then check the local ordinance before spending money. Once that plan fits, choose chicks or started pullets with the brooder and feed requirements in front of you, not after the birds arrive.
Frequently Asked Questions
Do backyard hens need a rooster to lay eggs?
No. Hens lay unfertilized eggs without a rooster; a rooster is needed only for fertile eggs, and local noise or livestock rules may restrict keeping one.
Can chickens free-range instead of having a secure run?
Free-ranging can provide forage and exercise, but it does not replace a secure run for weather, nighttime confinement, or predator protection. Treat it as supervised or managed extra space.
What backyard chicken rules should a beginner check first?
Check city or county zoning, flock-size limits, rooster bans, coop setbacks, nuisance rules, HOA restrictions, and any requirements for waste or slaughter before buying birds.