Chicken Predator Protection: Hardware Cloth vs Chicken Wire
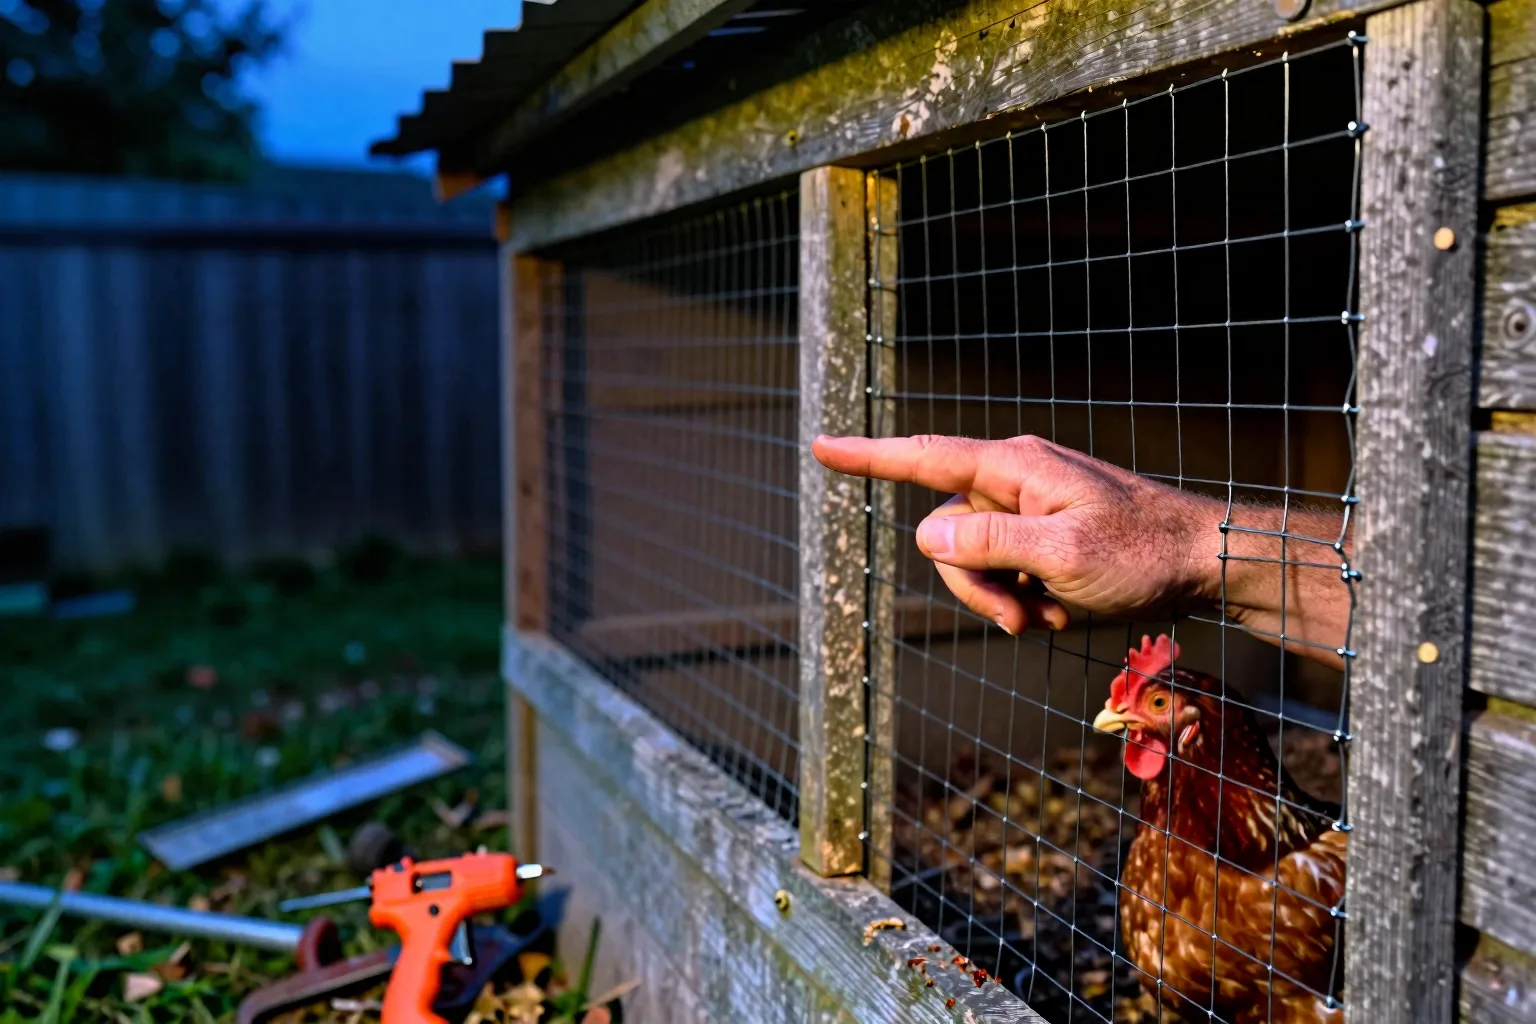
Press your palm flat against a chicken-wire run wall and push one finger through a hex. It slides in past the second knuckle without much resistance. That one test settles most of the hardware cloth versus chicken wire argument, because a raccoon's front paw is roughly as dexterous as your hand and quite a bit stronger.
Chicken Wire Has a Mesh Problem, Not a Strength Problem
The openings in the hexagonal wire everyone calls chicken wire run roughly one to two inches across. The wire is thin, commonly somewhere around 20 to 22 gauge, and the joints are twists rather than welds. Both facts matter, but not equally.
Here's the part that surprises new keepers: when birds are lost through a chicken-wire wall, keepers commonly report there was no torn hole to find. The mesh is intact. A few feathers caught in the wire at roost height, and that's the whole story. Nothing had to break. Something reached.
That's the failure mode you're actually building against on a backyard run. Not a battering ram. An arm. A hen sleeping with her back against the mesh, or a bird that panics into a corner at 2 a.m., puts herself within reach of anything whose paw fits an inch-and-a-half hole. Half-inch hardware cloth ends that attack on geometry alone. Nothing gets in far enough to grab, so the animal's strength never enters the conversation.
Chicken wire isn't weak in tension. Try cutting a roll with dull snips and you'll respect it. It's simply the wrong shape for exclusion, and no amount of extra staples changes the size of the hole.
What Chicken Wire Is Actually Good For
Now the fair half. Chicken wire is excellent at the job its name describes: keeping chickens where you put them. It's light, it takes a curve without fighting you, it cuts with hand snips, and it costs a fraction of welded cloth.
It seems built for containment rather than exclusion. That's an editorial read rather than a documented design brief, but it's a fair guess about a material that does the first job beautifully and the second one badly. Judge it on the first job and it's still worth buying.
Good uses, all of them inside an already-secure structure or away from sleeping birds:
- Interior dividers. A broody pen, a grow-out section, a bachelor corner. The perimeter is already hard; this is just a partition.
- Keeping hens out of things. A two-foot skirt around the vegetable beds, a barrier across an under-deck gap so nobody lays a clutch you can't reach.
- Daytime-only range fencing. Fine as a visual and physical boundary for birds you shut into a solid coop at dusk.
- Overhead cover on a run, with a caveat below.
The rule worth handing a first-timer: if your birds sleep behind it, it isn't a chicken-wire job.
On hawks, overhead cover works mainly by taking away the dive and the exit. A raptor that drops into an enclosed run has to climb back out of the same gap carrying weight, and netting or crossed line over the top interrupts that. The further idea that hawks simply won't commit to a covered space they can't read is plausible and widely repeated among keepers, but treat it as a behavioural read rather than a measured fact. Build for the exit path and you don't have to bet on the psychology. One practical caution about material: thin hex wire sags across an unsupported span and holds wet snow, so for a roof, aviary netting is the better pick for raptor cover, and welded panels are the better pick anywhere raccoons can climb to.
Hardware Cloth Gauge and Mesh Size: The Numbers That Decide Outcomes
The common baseline for a predator-resistant run is half-inch mesh in 19-gauge or heavier galvanized welded hardware cloth. Step down to quarter-inch on coop vents, windows, and anywhere weasels, rats or snakes are a known local problem.
Gauge is the number people skip, and it's the one that decides whether the panel holds up. Wire gauge runs backwards — a lower number means thicker wire, the same convention behind American wire gauge. A 19-gauge half-inch cloth and a 23-gauge half-inch cloth look identical in a product photo and identical on a shelf from six feet away. In the hand, the thin one flexes like window screen. Thickness is what resists chewing at a weld, prying at an edge, and the slow bending that opens a gap along a fastener line. Mesh size stops the paw. Gauge keeps the mesh where you put it.
Two more specs worth reading off the label before you buy:
- Welded, not woven. Welded joints hold their grid shape when something leans on them. Twisted or woven joints can be worked open.
- Galvanized after welding where you can get it. Coating applied after the welds means the weld points themselves are protected, and weld points are exactly where rust starts on a run wall that gets rained on for a decade.
Weight is the honest tell when a listing is vague. A roll of genuine 19-gauge half-inch cloth is heavy for its size. If the shipping weight looks light for the square footage listed, be suspicious of the gauge claim and go find the spec sheet rather than trusting the headline.
On quarter-inch mesh, don't default to it everywhere. It costs more per square foot, weighs more, and cuts noticeably more airflow and light, which is a real trade-off if you're already working on winter ventilation without a heat lamp. Use it where small-bodied predators are the actual local risk and half-inch elsewhere. And be honest about the limit: mesh fine enough to stop mice is finer than anything you'd want covering a coop wall. Mice are a feed-storage problem, not a wire problem.
Where the Two Materials Belong on a Real Coop and Run
A full hardware-cloth build is the safest thing you can do, and it isn't always what your budget or your yard needs. Zoning the structure gets you most of the protection for a good deal less money.
| Zone | What it's defending against | Material to use |
|---|---|---|
| Run walls, ground to about 3 ft | Reach-through, chewing, pushing at the base | ½-in hardware cloth, 19-gauge or heavier |
| Run walls above 3 ft (roofed run) | Mostly containment | Chicken wire or light welded wire is defensible here |
| Run walls above 3 ft (open-top run) | Climbers coming over the top | Hardware cloth full height, or an electric strand |
| Run roof | Hawks, owls, climbing raccoons | Netting for raptors; welded panel or cloth if climbers can reach |
| Coop vents, windows, gable openings | Everything, at the point people trust most | ½-in or ¼-in cloth, screws and washers |
| Pop door and nest box lid | Dexterous paws working a latch | Solid material plus raccoon-proof latch and door hardware |
| Run perimeter at ground level | Digging | Hardware cloth apron, see below |
Vents are the zone to fix first on any existing coop. They're small, they're high, and people screen them with whatever's left in the garage. A gable vent covered in insect screen or thin hex wire is a hole with a suggestion over it, and it's usually the one opening nobody re-checks in year three.
Space matters here too, in a way that isn't obvious. A cramped run makes birds crowd the walls, and crowding the walls is precisely what puts a bird within reach of the mesh. If you're not sure how much run space each bird needs, sort that out before you spend on wire, because a tighter run needs a better wall to reach the same level of safety.
The Dig-Proof Apron: Why Vertical Wire Alone Still Fails
You can wrap a run in perfect 19-gauge cloth and a fox will still walk around it, put its nose to the base, and start scraping. Foxes, loose dogs and coyotes dig where their nose says the birds are, which is right at the wall line — not two feet out where a deep trench would need to start.
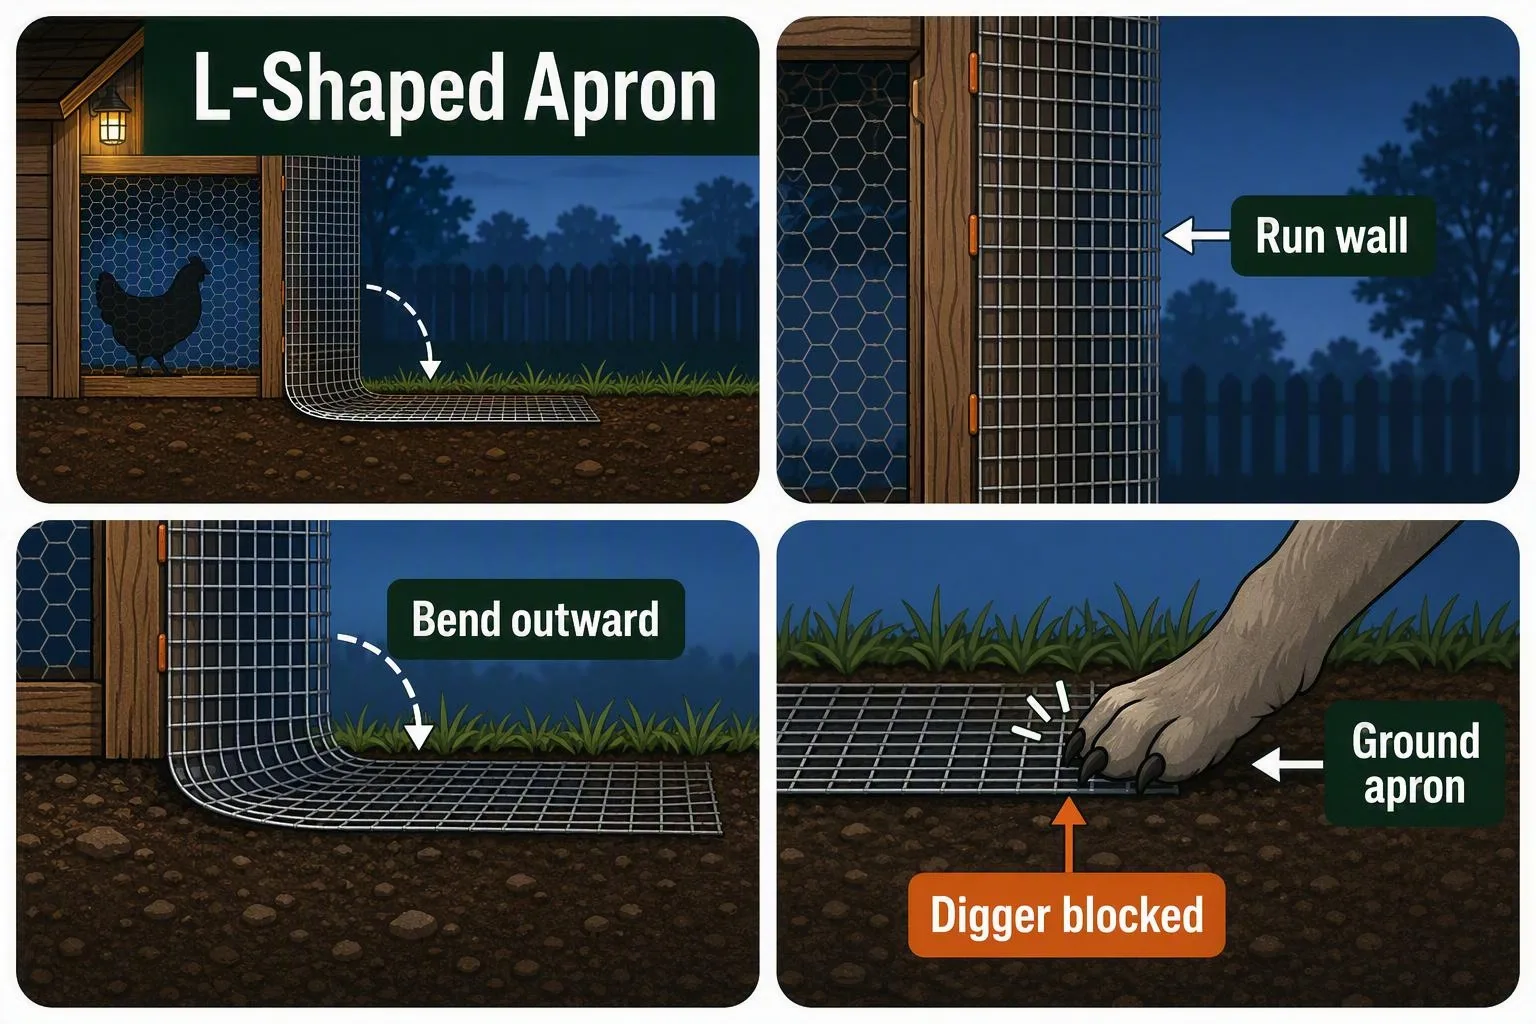
That behaviour is also the fix. Lay a horizontal apron of hardware cloth flat on the ground, running 18 to 24 inches outward from the base, and fasten it securely to the bottom of the run wall so there's no seam to nose under. The digger hits wire the instant it starts, at the exact spot it wants to dig, and most won't back up and restart a fresh hole two feet out.
Two ways to build it:
- Surface apron. Pin the cloth flat on the turf with landscape staples every foot or so. Grass grows up through the mesh within a season and locks it down, and the mower goes straight over it. Fastest option, and the sensible default on established lawn.
- L-footer. Dig a shallow trench 6 to 12 inches deep along the wall, run the cloth down and then bend it outward along the trench floor before backfilling. Better where you don't want visible wire, or where the soil is loose sand that a digger moves easily.
Either way, the apron does nothing if it's wired to the wall in only a few spots. Stitch that joint continuously. A hand-sized gap between apron and wall is a door.
Worth knowing what success looks like: a scrape hole against the base of the run with the apron still flat and intact. That's not a near miss to panic about. That's the apron doing exactly the job it was built for.
Retrofitting an Existing Chicken-Wire Run Without Rebuilding It
If you inherited a chicken-wire run or built one before you knew better, don't tear it off. Leave it in place. It costs nothing to keep, it holds birds off the new work while you're installing, and two layers with a small air gap are marginally harder to chew than one.
Order of work, highest return first — worth saving this list before you head to the hardware store:
- Coop vents, windows and any opening in the sleeping quarters. Cheap, fast, and it's where an unhardened gap does the most.
- The apron. Digging bypasses everything above it, and a surface apron on 40 feet of perimeter is an afternoon.
- Bottom three feet of run wall, prioritising any stretch where birds actually roost or crowd.
- The top, if the run is open and something can climb in.
Fasteners decide whether this holds. Poultry staples work loose as framing dries and shrinks, and a paw hooked under a lifted edge peels the panel back. Use exterior screws with one-inch fender washers every 6 to 8 inches along every framing member, or run a wooden batten strip over the cloth edge and screw the batten down. The batten spreads the load across the whole seam and is the stronger of the two. If you're stapling anyway, use galvanized narrow-crown staples and add the batten.
Overlap seams by 2 to 3 inches and stitch them with hog rings or stainless wire ties every 3 to 4 inches. An unstitched overlap is a flap. At corners, resist wrapping one continuous sheet tightly around a post: the cloth springs away from the inside of the bend and leaves a triangular gap. Cut it and lap both pieces on the flat face of the post instead.
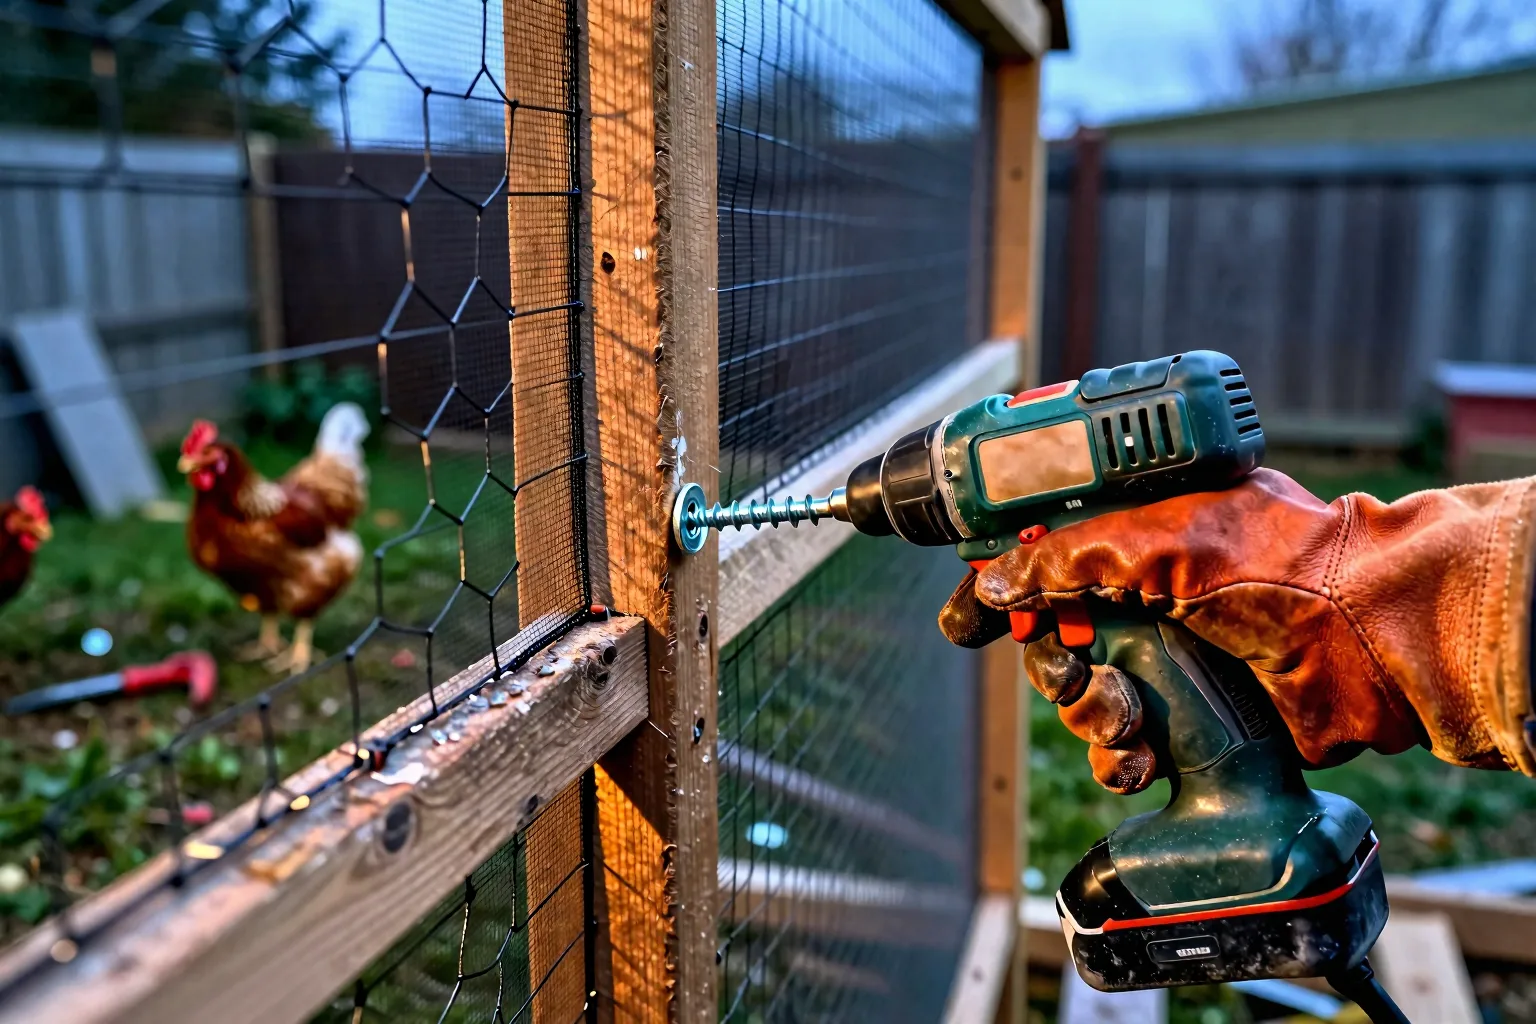
Practical handling notes. Wear leather gloves, because cut ends of welded cloth are genuinely nasty. Unroll the cloth backwards against its own curl and weight it overnight to flatten it, or you'll fight the memory of the roll for the entire install. Cut with aviation snips rather than side cutters and the edges come out straight enough to lap cleanly. And where a section of old chicken wire ends up buried under new cloth in a spot nobody will revisit, mark it on a sketch — whoever traces a draught or a rust line in five years will want to know what's under there.
One judgement call worth stating plainly: if you can only harden part of the structure this season, harden the sleeping quarters completely rather than doing a thin, even upgrade everywhere. A run that's 70 percent improved is still a run with a weak point, and predators are patient enough to find it. A coop that's fully sealed is a real fallback, every night, while the run catches up.
What This Actually Costs Per Linear Foot
Prices move too much by region, retailer and season for a number here to be worth anything, so here's the method instead, plus what to expect from the comparison.
Expect hardware cloth to cost a multiple of chicken wire per square foot, not a few percent more. The reason is physical: heavier wire, more of it per square foot at half-inch spacing, and a welding step instead of a twist. If you price both at your local farm store and they land close together, look hard at the gauge on the cheaper cloth — that's usually where the saving came from.
Both are sold by the roll, in a handful of standard widths — 24, 36 and 48 inches are the ones most commonly stocked. Convert everything to square feet and the comparison stops being confusing:
- Wall band: perimeter in feet × height of the band in feet.
- Apron: perimeter in feet × apron width in feet.
- Add about 10 percent for overlaps, corners and cutting waste.
Worked example, an 8 × 12 ft run. The perimeter is 40 linear feet. A three-foot hardened band gives you 120 square feet. A two-foot apron all the way round adds 80. That's 200 square feet, call it 220 with waste, so roughly two 48-inch × 50-foot rolls. Take that 220 figure to whatever price per square foot you find locally and you have your real budget in about a minute. Want the whole run in cloth at six feet tall instead? That's 240 square feet of wall, plus 96 more if you're covering the top — a jump worth doing the arithmetic on before you commit, because it roughly doubles the wire bill on the same footprint.
The framing, roofing and fasteners on a run of that size are typically the bigger part of the total build, so the wire choice usually isn't the line that decides whether the project happens. That's a judgement about typical small builds rather than a survey, and it flips fast if you're wrapping a large run or buying quarter-inch everywhere. Check current prices where you actually shop, including online, since shipping on a heavy roll can wipe out a per-foot saving entirely.
This week: take a tape measure to your coop vents and windows, count the square feet, and buy just that much half-inch cloth plus a box of screws and fender washers. It's the smallest purchase on the list and it closes the openings people trust most without checking. Then, if chicks are in your near future, apply the same mesh logic to a predator-proof brooder for chicks outdoors — an outdoor brooder is a coop with smaller occupants and thinner margins, and quarter-inch cloth earns its price there more than anywhere else on the property.